

How To Paint Like A Photorealist
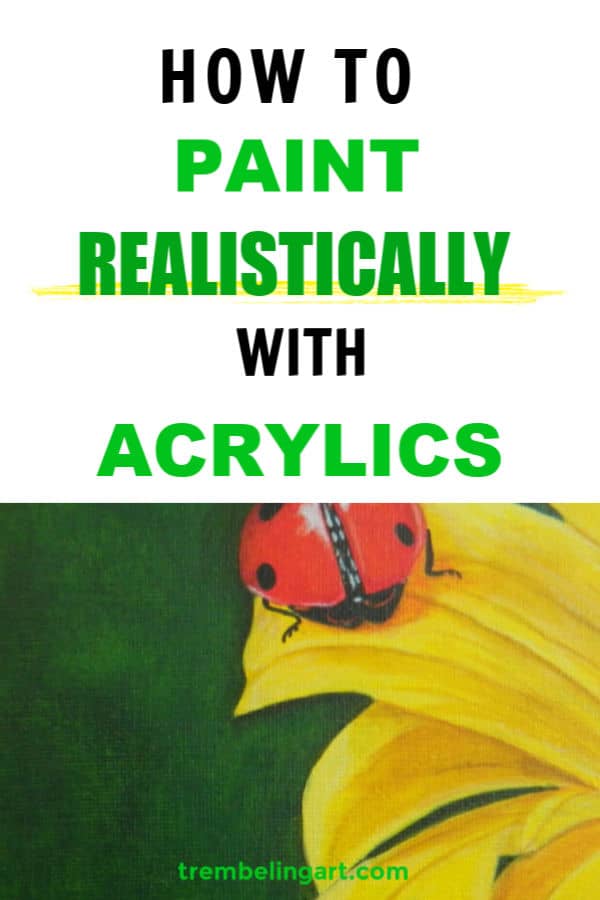
Painting photorealism is the process of painting a highly detailed flick from a photograph. Doing a photorealstic painting is not a quick process. In this commodity I volition requite you lot some tips on how to paint photorealism with acrylics.
Attention to detail, dissimilarity, value and the proper perspective all contribute to a photorealistic look but it takes fourth dimension and patience to paint in a photorealistic style.
Photorealism is a great learning tool for get-go artists. Below are some guidelines to get yous started painting photorealism.

**This folio may incorporate chapter links to products I have used or recommend. If you purchase something from this page, I may receive a small percent of the auction at no actress price to you. For more information click here.**
Preparing Your Canvas For Painting
Start with a smoothen sail, panel or board. A smooth surface makes it easier to blend and get clean lines.
Give your surface a few coats of gesso and lightly sand to get the caste of smoothness you want. Cheque out my post on how to gesso a canvas for more than info and tips.
Once the gesso has dried and you have wiped it clean, add a ground or base coat of thinned out pigment. This will give you an evenly pigmented surface to start on and you lot won't be fighting the white of the sheet.
What color ground you employ will depend on the subject of your painting. A dull, moody landscape would benefit from a mid grey ground while a bright sunset would be meliorate washed with a light globe tone.
Composition of a Photo Realistic Painting
Decide on the composition of your painting. Don't have your master focal indicate smack in the middle of your piece of work.
Following the dominion of thirds will, in most cases (but not all) make your composition more interesting.
The rule of thirds is a guide of sorts to arranging the focal signal or points in your painting or photograph in a more pleasing and heart communicable way.
Information technology basically divides your scene into ii horizontal lines and two vertical lines, forming a grid. The master subject or subjects of your painting should sit either on the lines or on the intersections.
Arranging the elements within your work in this mode volition guide the viewers eye across your painting and give your work a more pleasing and interesting composition.
If yous desire a more in-depth discussion nigh the rule of thirds My Modern Met has a swell article. https://mymodernmet.com/rule-of-thirds-definition/

Beginning Simple
Don't make your painting too decorated, especially if you are a beginner. Adding besides many elements into a realistic composition tin can overwhelm you lot.
Starting time off with i focal point such equally an apple on a table. Do another painting with ii apples and find how they interact with one another, how their shadows overlap, how their shapes and tones are different, etc.
From there you tin add together a bowl or other items. As yous paint you will learn how each element inside a painting affects the others making it easier to achieve photorealism.
If you are drawing from a photo take the time to really look at information technology. Observe where the darkest shadows are and where the lightest highlights occur. See where the light source is coming from and where information technology hits the objects in your photo.
Notice the subtle variations of colour inside the objects in the photo. For instance, a lake is never i shade of blue. There could be subtle purples, pinks, greens and browns within the various shades of blue.
It is these variations in color that will requite your painting more depth and realism.
Painting realistically is a lot about observing details that a viewer doesn't fifty-fifty realize they are seeing.
Drawing the Subject
Practice an accurate drawing of your subject. Whether y'all are using a reference photo or painting from sight, having an accurate drawing to showtime with is important.
I utilize a watercolor pencil to describe my subjects onto the canvas. Information technology volition easily wash off or be covered past paint.
There are several methods you lot can use to transfer the scene onto your sail if you are not comfortable with freehand drawing. See my post on how to transfer a reference photo to a canvas.
Color Chart
Make up one's mind on the colors you want to use in your painting. Information technology is helpful to make a color chart with the colors you desire to use and the mixes you demand to get authentic colors. This is not absolutely necessary merely it is helpful.
It tin can exist confusing to pick out the right colors in a subject since the centre is influenced by the colors surrounding information technology. A pull a fast one on I utilise is to cutting a small hole in an index bill of fare and hold it over the reference photograph.
This helps to isolate the color without the influence of the surroundings. I find the index card makes it easier to approximate the color accurately.

Lights and Darks
Pigment in your darkest values start. Don't utilise straight black! Instead employ browns such equally burnt umber or nighttime grays or other colors such every bit deep blues depending upon the overall tone of your painting.
If the painting needs a very dark shadow, use the black mixed with some other color from the object casting the shadow to requite the shadow more life. Straight black tends to be tiresome and flat.
Apply correct values and contrast. Using lights and darks in the right places will create depth in your painting. Using the wrong values can make your painting look apartment and lifeless.
Objects in the distance will accept a lighter value than objects in the foreground. They are less divers and detailed and will appear smaller than objects in the foreground.
Don't outline to give dissimilarity or separate objects from the surroundings. At that place are no outlines in nature. Alloy edges where necessary and employ different values to separate elements.

Shadows
Shadows are soft and gradual. They don't abruptly end in a hard edge.
As I said to a higher place, shadows are likewise rarely black. They are a grayed downwardly or concealment of color. The darkest area of the shadow is closest to the object. Blend the shadows out to nothing.
Pay attending to the fourth dimension of mean solar day and season when calculation your shading. A summer sunrise will have warm shadows = reds, pinks, oranges while a common cold winter evening will have cool shadows = blues, greens, purples.
Highlights are almost never pure white. They are ordinarily a lighter shade of the base color. Pure white is saved for the brightest highlight such as the "twinkle" in an eye. See my post on highlighting and shading.
Perspective
Having the proper perspective is important in a photorealistic painting. Objects in the distance are mostly smaller than those closer to the viewer.
And then in a landscape painting of a mount and copse, the mountains announced much smaller and the trees become larger and more divers the closer they get to the viewer. Paint the background get-go and work your way forward from at that place.

Details
Once you have finished blocking in the main areas of your painting it is time to do the smaller details that volition brand your painting popular. Use a particular castor or other pocket-sized castor to add the finer lines and tiny details.
While details are important for painting photorealism, they are not the most important matter. Doing an accurate underpainting with proper placement of values is more of import.
Having perfect eyelashes on a face with no contour or shading will not wait realistic. All of the elements I talked near in a higher place come together to make a photorealistic painting.
And of grade practice, practice, practice!
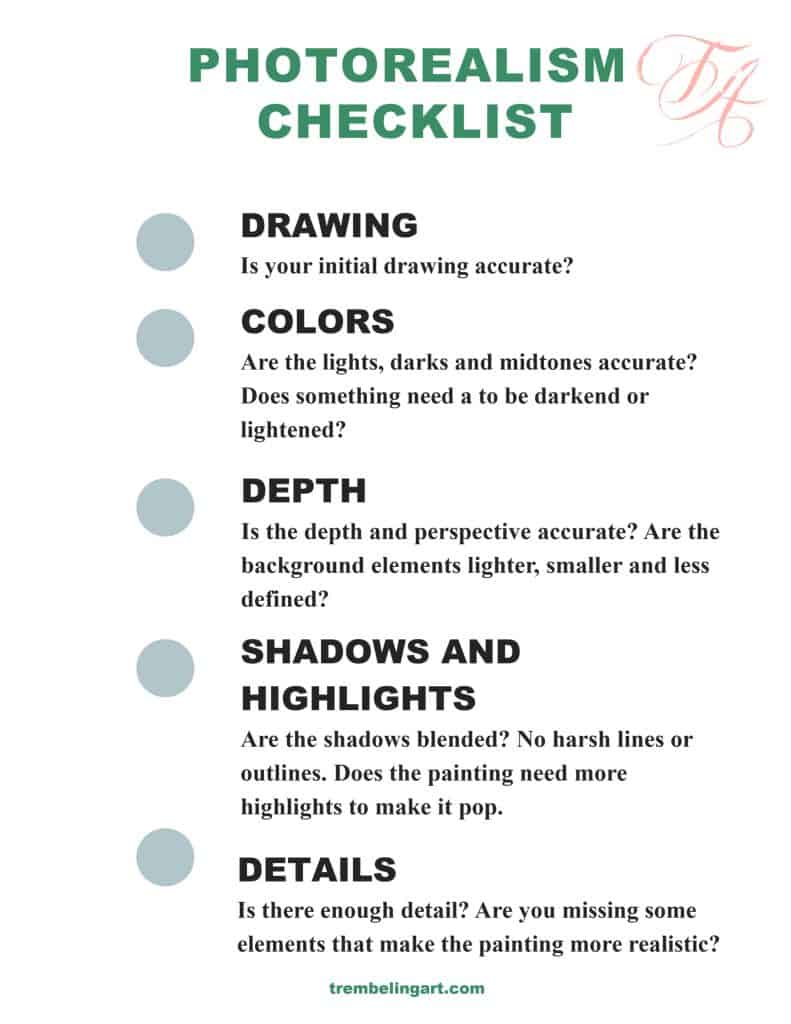
One time you have finished your painting, step back and have a await at information technology. If it doesn't look quite right to you, become through the checklist below and see what needs adjusting. Feel free to print off the checklist for your own reference.
The Controversy Over Photorealistic Painting
There is some controversy in the fine art globe about whether photorealism is actually art. Some say photorealism is just copying a photograph.
I believe everything we do with our hands is fine art, from painting and drawing to woodworking to cooking and beyond. Photorealism is just some other expression of ourselves.
The painting below is taken from a picture of a boxcar my father made many years ago. The original picture contained other equipment and items from everyday life but I wanted to focus on something my father made with his own hands.

I could have photoshopped the other items out of the picture, simply actually putting the brush to canvas and recreating, if just in paint, something that he had created gave me a sense of peace and connection with him.
Not all photorealistic paintings accept such meaning behind them. I savor painting photorealism because of the challenge information technology represents to someone with Parkinson'southward.
Near photorealistic artists go a sense of accomplishment from seeing their painting progress to the point where you lot cannot tell the departure betwixt the photograph and the painting.
There is and then much more involved than merely copying a photo. Doing an accurate drawing, getting the values right, having the right contrast and perspective, shading and highlighting correctly are all necessary elements in a photo realistic piece of art.
I promise these tips are helpful to you and encourage you to try some photorealstic artwork. Painting is an ongoing learning procedure, even for master painters. The more you lot paint, the better you lot get.
If y'all take any questions or suggestions, I would dearest to hear from yous.
Thanks for reading.


Source: https://trembelingart.com/paint-photorealism-acrylics/
Posted by: faulkneropents1991.blogspot.com
0 Response to "How To Paint Like A Photorealist"
Post a Comment