

How To Paint Texture Without Sanding New Sheetrock
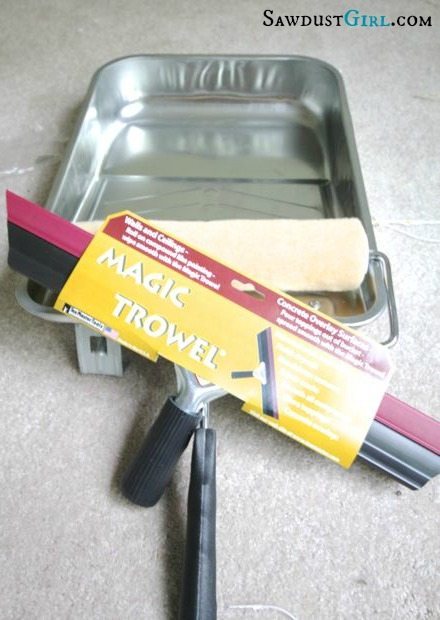
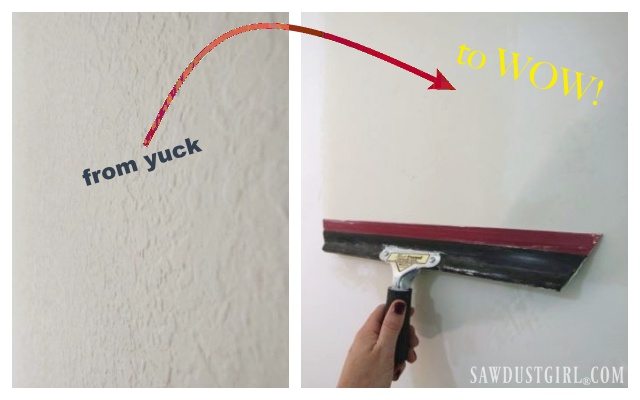
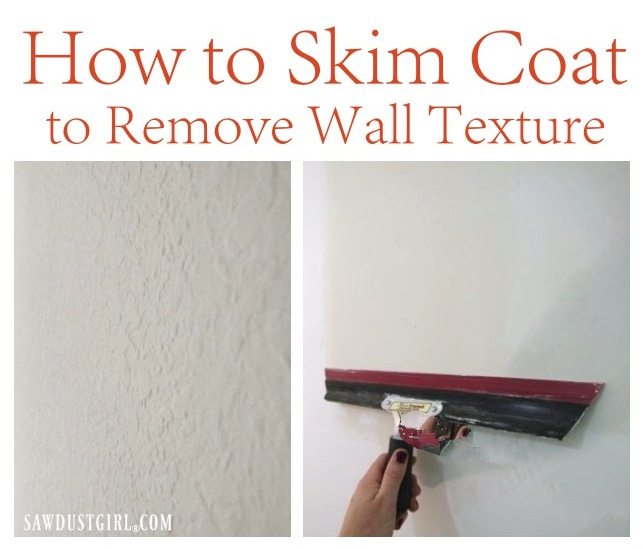
If you've been post-obit my home remodels, you lot know I am not a fan of wall texture and do a lot of skim coating to get shine walls. Skim coating means skimming a thin layer of joint chemical compound or plaster to your walls. The materials needed are adequately inexpensive so the price of having it done by a professional is mostly for labor. If you have the time and patience to do it yourself, skim coating can be done using a $28 Magic Trowel and a thick nap paint roller.
How to skim coat
Prep your space
Drywall work tin can get actually messy then take a little time to prep your space before you start mixing your joint compound. Cover the floors, article of furniture, appliances, etc, and seal off the room you're working on to contain the dust to that room. If yous but jump in and start skim coating, you'll probably end upwardly cleaning drywall dust out of every nook and cranny of your house for a few months.
Gather your supplies
- all purpose joint compound
- Paint tray or 5 gallon bucket
- mixing zipper for your drill
- thick nap paint roller
- spray bottle with water to thin you joint compound
- moisture rag
- Magic Trowel
- drop textile (cover your floors)
- drywall sander
If you're doing a small room where y'all'll simply need one saucepan, I'd choose a gear up mix joint compound. It costs about $xv for a 5 gallon saucepan. Then for $xv you get the mud and a bucket.
Dry joint chemical compound is much cheaper. You tin get about iv times the coverage with dry mix mud. If yous're doing a LOT of skim coating, dry is probably a cost constructive pick. Yous still need the v gallon bucket which runs about $iv-5.
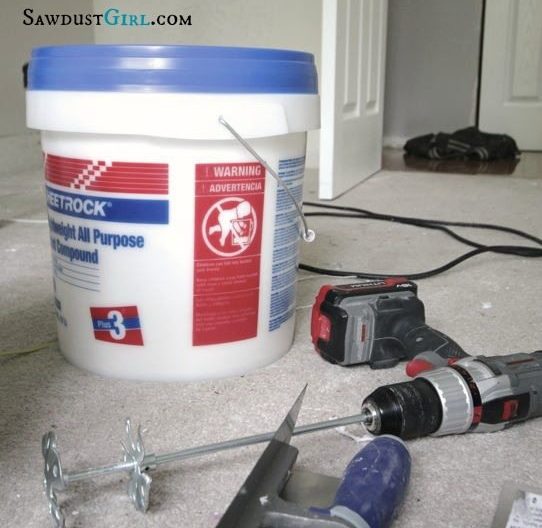
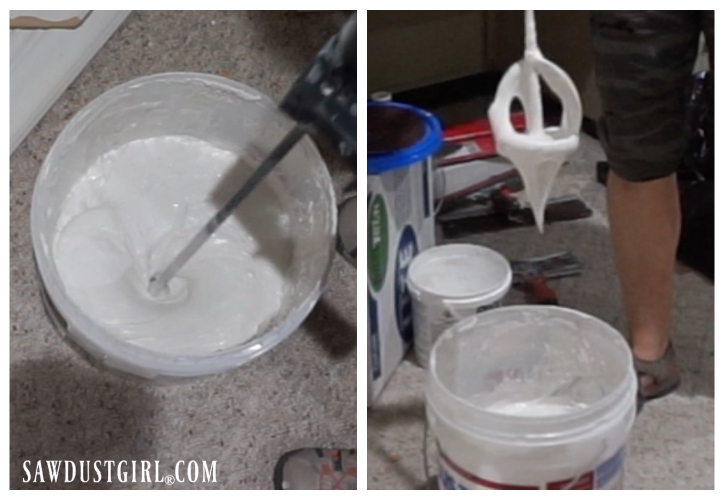
Set up the joint compound
Use a a mixing zipper for your drill to mix the articulation compound to the consistency of thick pancake batter. It's got to be thin enough for you to smooth information technology on the wall but non so thin that information technology just drips and dribbles downward the wall. You may have to play around with it until yous get the "only right" consistency.
If you're using ready mix mud, add together a trivial water at a time and so you don't end upwards making information technology too runny. This is where dry out mix can be benign. If it does end upwardly too runny, add together more than dry mix.
Apply articulation compound to wall
Work in small sections at a time. The mud is watered downward then it will dry out adequately speedily and y'all accept to apply it to the wall and and so skim it smoothen. I generally work in 4'x4′ sections. Depending on the temperature and humidity of the room you're working in, you may exist able to do larger sections.
Using a thick nap paint roller, apply a generous corporeality of mud to the wall. Using a roller allows you to get more compound on the wall faster than if you lot were scooping it out with a taping knife. You can pour joint chemical compound into a roller tray or dip the roller directly into the 5 gallon bucket.
I generally adopt the bucket method because it'southward faster but it is also messier because the excess mud drips off the roller every bit y'all pull it out of the bucket.
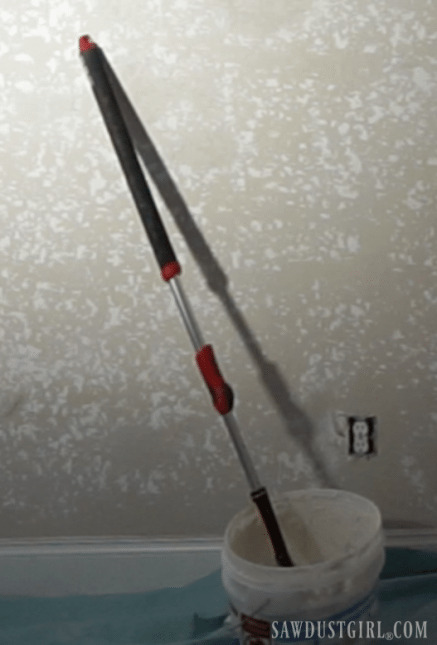
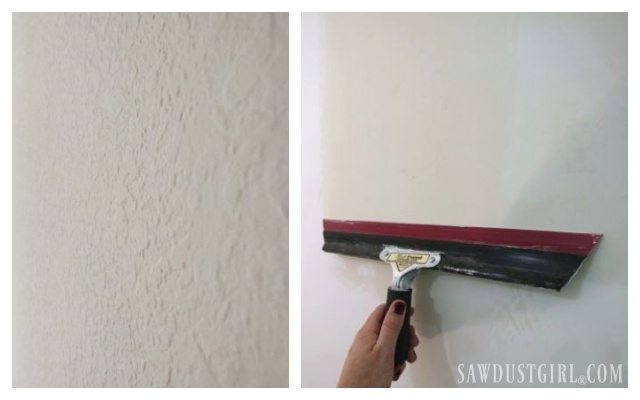
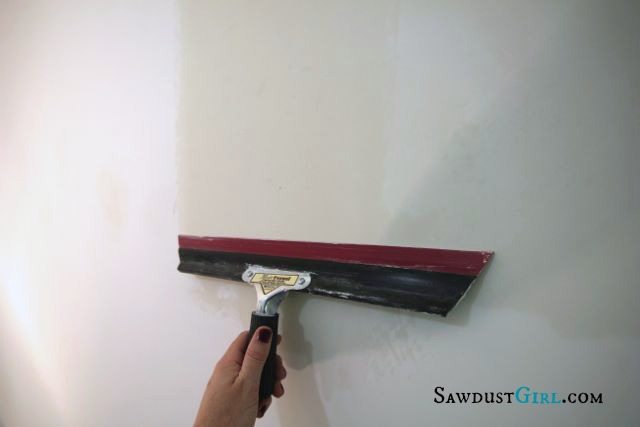
Skim the walls with the Magic Trowel
After rolling the mud onto your first section, use the magic trowel to smooth it out. The starting time glaze won't be perfectly polish. The chemical compound is filling the voids that around the raised surfaces in the existing texture. If you have a really heavy texture, you'll need more layers of joint compound.
- Each coat of mud should exist smoothed in the aforementioned direction every bit it was applied onto the wall with the roller.
- Alternate directions of each sequent coat.
- If you rolled the mud onto the wall vertically on the showtime coat, switch to horizontal awarding for the next coat.
After smoothing out your first section of wall, you're fix to whorl some other department with joint compound.
- Proceed a wet edge. That's where the spray bottle full of water comes in handy. Before you beginning rolling chemical compound onto your second section, lightly mist the edge of the surface area you just smoothed.
- Slightly overlap the first section equally you roll the second section.
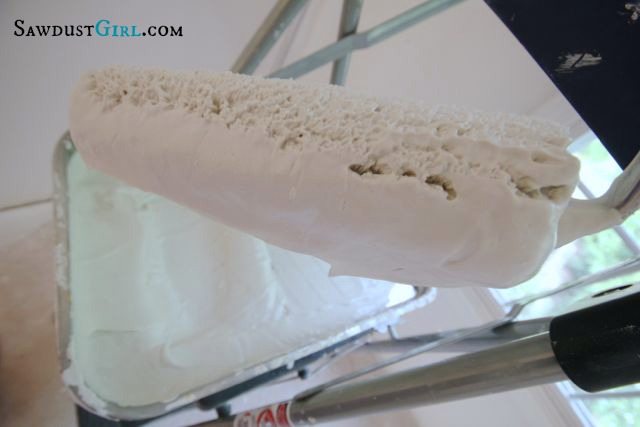
The Magic Trowel is like a duster. Information technology's a rubber blade on a handle. It does come with a cover over the blade. Make certain to remove the blade comprehend!
- Utilize your damp rag or spray bottle to wet the bract before use.
- Pull the Magic Trowel over the compound, smoothing it out.
- Duster the mud in the aforementioned direction that y'all applied information technology with the paint roller.
If you take really heavily texture patterns, the first glaze will non produce perfectly smooth walls. The Magic Trowel may create new lines. Don't freak out. The adjacent coat will set that.
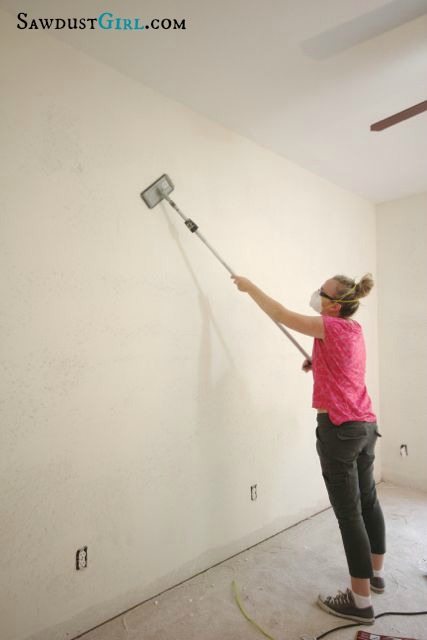
Lite your work surface


Shining a light at an bending on the wall you're working on. The angle is of import considering it allows y'all to come across more imperfections than y'all see with down lighting. This is truthful when painting also. When you think y'all're washed, move the calorie-free so it'southward shining from a different angle. Yous'll be surprised to see how many areas you missed. The below movie demonstrates a wall I thought was finished until I moved the light and illuminated my wall from a different angle.
Sanding Drywall
You can lightly sand in between coats simply it's not necessary. Each consecutive glaze with the Magic Trowel will make the wall more and more smooth. If anything, you may accept lines created by the backlog mud sliding off the border of the trowel as you skimmed over the wall. These lines are very easy to get rid of with a quick sanding.
Drywall sanding can be VERY dusty. You shouldn't have much to sand after skim coating. Just a gentle sanding over the whole surface with a very light grit sandpaper. Sanding without a vacuum attachment will make a Big MESS everywhere in your firm. You have 3 options:
- Use a regular pole sander and worry most cleaning up the dust after. Brand sure you lot wear a dust mask or respirator.
- Wet sand. Use a slightly damp tiling sponge to gently rub away lines and imperfections.
- Use a grit gratis drywall sander (This is definitely worth the $thirty price tag.)
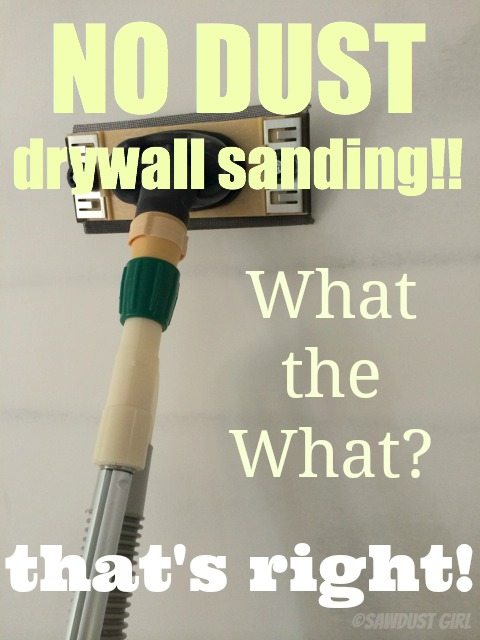
Y'all can also apply a box fan toreduce dust when sanding drywall .
I'll be frank with you, skim coating is messy. It takes some practice to larn the skill. Information technology's hard work. It's tiring and can be frustrating. Simply smoothen walls are worth the effort!
Correct?
Information technology's definitely a personal thing. Some people like orange peel and other textured finishes. Give me a well-baked, clean, polish wall whatever twenty-four hour period of the week! So what practise you think? Now that y'all know how to skim coat, are you going to give it a try? Just think to protect your floors. Unless you're working in a room where y'all're going to remove the carpet. If that's the case, go ahead and use that carpet as your drop cloth and don't worry if yous drop blobs of joint compound. Only don't step in them and track information technology all over the house. Ehem…lesson learned!

Source: https://sawdustgirl.com/how-to-skim-coat-get-rid-wall-texture/
Posted by: faulkneropents1991.blogspot.com
0 Response to "How To Paint Texture Without Sanding New Sheetrock"
Post a Comment